
Hello, my name is Eddie and I'm a chocolate addict...
One of my biggest weaknesses is chocolate, so this experiment was both exciting and fattening for me…
There are several traditional tempering methods which involve heat measurements, seeding or tabling using continuous movement.
I decided to temper chocolate while staying in my comfort zone (sous vide), and the results were pretty good.

What is Tempering / Pre-crystallization?
Chocolate contains cocoa butter, which consists of stable and unstable crystals. When you melt chocolate, the structure of the stable crystals is broken and if you let it set, the chocolate will take longer to harden and will result in a softer texture, the chocolate will melt when touched and will lose its shine.
Chocolate can be be solidified into one of 6 different crystals, but the stable crystal which is also called beta has the highest melting point. In order to form enough beta crystals, we need to pre-crystallize (temper) the chocolate - only then we'll get a snappy, shiny and hard to melt chocolate
Here's what you'll need:
-
150 grams / 5 oz - enough for one chocolate polycarbonate mold
-
Chocolate molds.
-
Additional sweets for the kids playground
-
Ganache - I used dulce de leche that was cooked in sous vide at 85°C/185°F for 14 hours


Tempering and Temperatures
The tempering process involves cooking the chocolate in three different temperatures in order to form enough stable beta crystals before you can start working with the chocolate.
Tempering using Sous Vide
The following temperatures apply to dark chocolate while milk chocolate should be 2°C lower and white chocolate 4°C lower respectively.
Here's how you do it:
- Place the chocolate buttons in a vacuum bag and seal it.
- Submerge the vacuum bags into the water, preheated to 50°C/122°F.
- After 15 minutes, lower the temperature to 28°C/82°F and start cooling the water by adding ice cubes or replacing the water.
- After 15 minutes at 28°C/82°F, change the temperature to 32°C/90°F and cook for another 10 minutes.
- Through the entire process, gently mix the liquids inside the bag by massaging the bag every few minutes.
Overall, the cooking/tempering process should take 40 minutes.


Working with the Tempered Chocolate
Once the tempering process is completed, you have 3 minutes to work with the chocolate and fill your molds, but keeping the bags inside the sous vide container will allow you to extend this time as needed.
I even placed a bowl inside the sous vide container in order to keep leftover chocolate from the molds, , but be careful - a drop of water can ruin your chocolate!

Pralines
- Fill the mold entirely with chocolate.
- Scrape off the excess chocolate from all sides.
- Slightly, tap the mold several times to get rid of air bubbles.
- Turn the mold over a bowl kept in the sous vide container, in order to save excess chocolate . You can reuse this chocolate in another batch of pralines.
- Make sure that the remaining layer of chocolate in your mold is thin.
- Put the mold in the fridge for 15 minutes for the chocolate to harden.
- Fill the mold with your preferred ganache, up to 2mm from the top of the mold, leaving room for the chocolate cover. I filled my pralines with dulce de leche that was cooked in sous vide at 85°C/185°F for 14 hours.
- Let the mold rest again in the fridge for the ganache to set.
- Fill the mold with tempered chocolate, covering the ganache entirely.
- Slightly, tap the mold several times in order to get rid of air bubbles.
- Scrape off the excess chocolate from all sides again.
- Put the mold in the fridge for 15 minutes for the chocolate to harden.
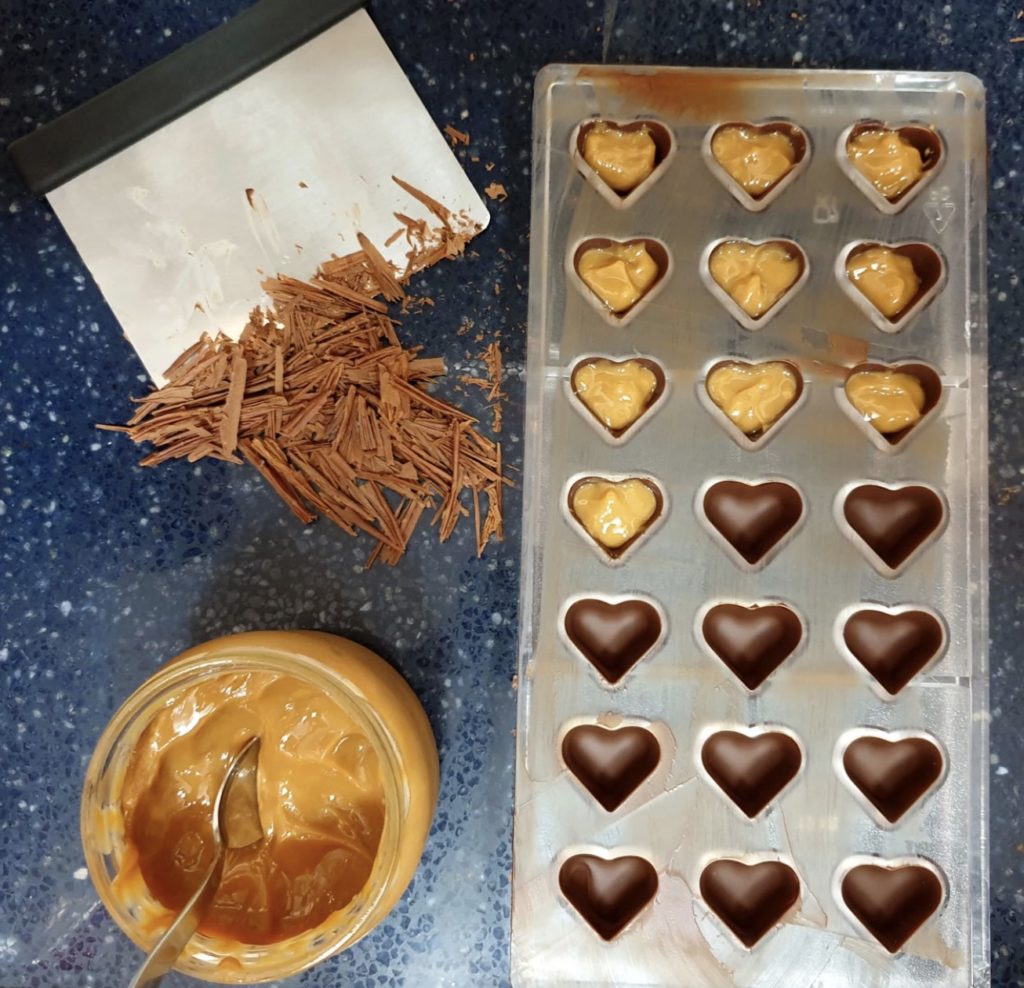
Mini Chocolate Logs
- Pour chocolate on a marble countertop and create a thin layer with a spatula.
- Wait until the chocolate starts losing its shine and then with a swift movement, scrape vertically the thin layer of chocolate


Playground for Kids
One of the main reasons I wanted to experiment with chocolate was to go through the process with my girls - it was very messy, but it was the perfect quality time together!
Final result

