

How to Weigh Down Sous Vide Bags
One of our most frequently asked questions encountered here at Anova is about sous vide floating bags – something experienced by old and new cooks. In fact, how to weigh down sous vide bags happens to be a very important issue, since unsubmerged ingredients simply will not cook this way. Also, when part of a protein remains above water, it can compromise the quality and safety of the entire piece. Well food nerds, we want to avoid sous vide floating bags, so we compiled a list of potential solutions. But first, why do the bags float in the first place?
The answer may seem simple - trapped air - but sous vide floating can often be more complex. You have used the immersion method and squeezed out every visible air pocket, or even vacuum sealed your bag, yet it still floats. What gives? Sometimes the food itself is buoyant, like most vegetables, liquids with a lower specific gravity than water (think infused alcohols), and frozen meat and seafood. Other times, the gas forms during the cooking process. This happens most notably with Brussel sprouts and other cruciferous vegetables, though sous vide bag floats can also occur when meat when particular bacteria are present* on the surface. *For the latter situation, this is typically an issue with longer cooks and the development of harmless lactobacillus bacteria. This can usually be countered with a quick sear or 30-second dip into boiling water pre-packaging for sous vide!
What can I do about sous vide floating?
Get as much air out as you possibly can. The most popular method to do this is the immersion method because it requires no special equipment and is very effective. One tip we have learned from our community is to execute this method in cool water as opposed to directly in the cooking bath; Anova-warmed water may not be boiling, but it sure can get HOT! Save your fingers by either using the immersion method in a separate container of cool water, or do it in the cooking bath before it heats up. If you have or can use a vacuum sealer, by all means do so!
Do what you can to hold the bags in place.
We achieve sous vide weight with bulldog or binder clips in the majority of our cooking experiments, but racks in vessels that can accommodate them are a great help. Racks, whether specially designed for sous vide or repurposed dish racks, file organizers, or lid-holders, provide a bit of stability to hold those cooking bags. The friction alone will discourage sous vide floating while the water is still able to circulate freely.
How to Weigh Down Sous Vide Bags
When getting all the air out and preventing the bags from moving is not enough, we look to the next level of options to get those sous vide floating bags in check. This can be achieved by using internal and external sous vide weights.Internal Weighting
Internally (inside the bag), the most commonly used method is to add a (dull) butter knife or two to the inside of your cooking bags. The food-grade stainless steel will not contaminate your meal, and most people have a spare butter knife or two laying around.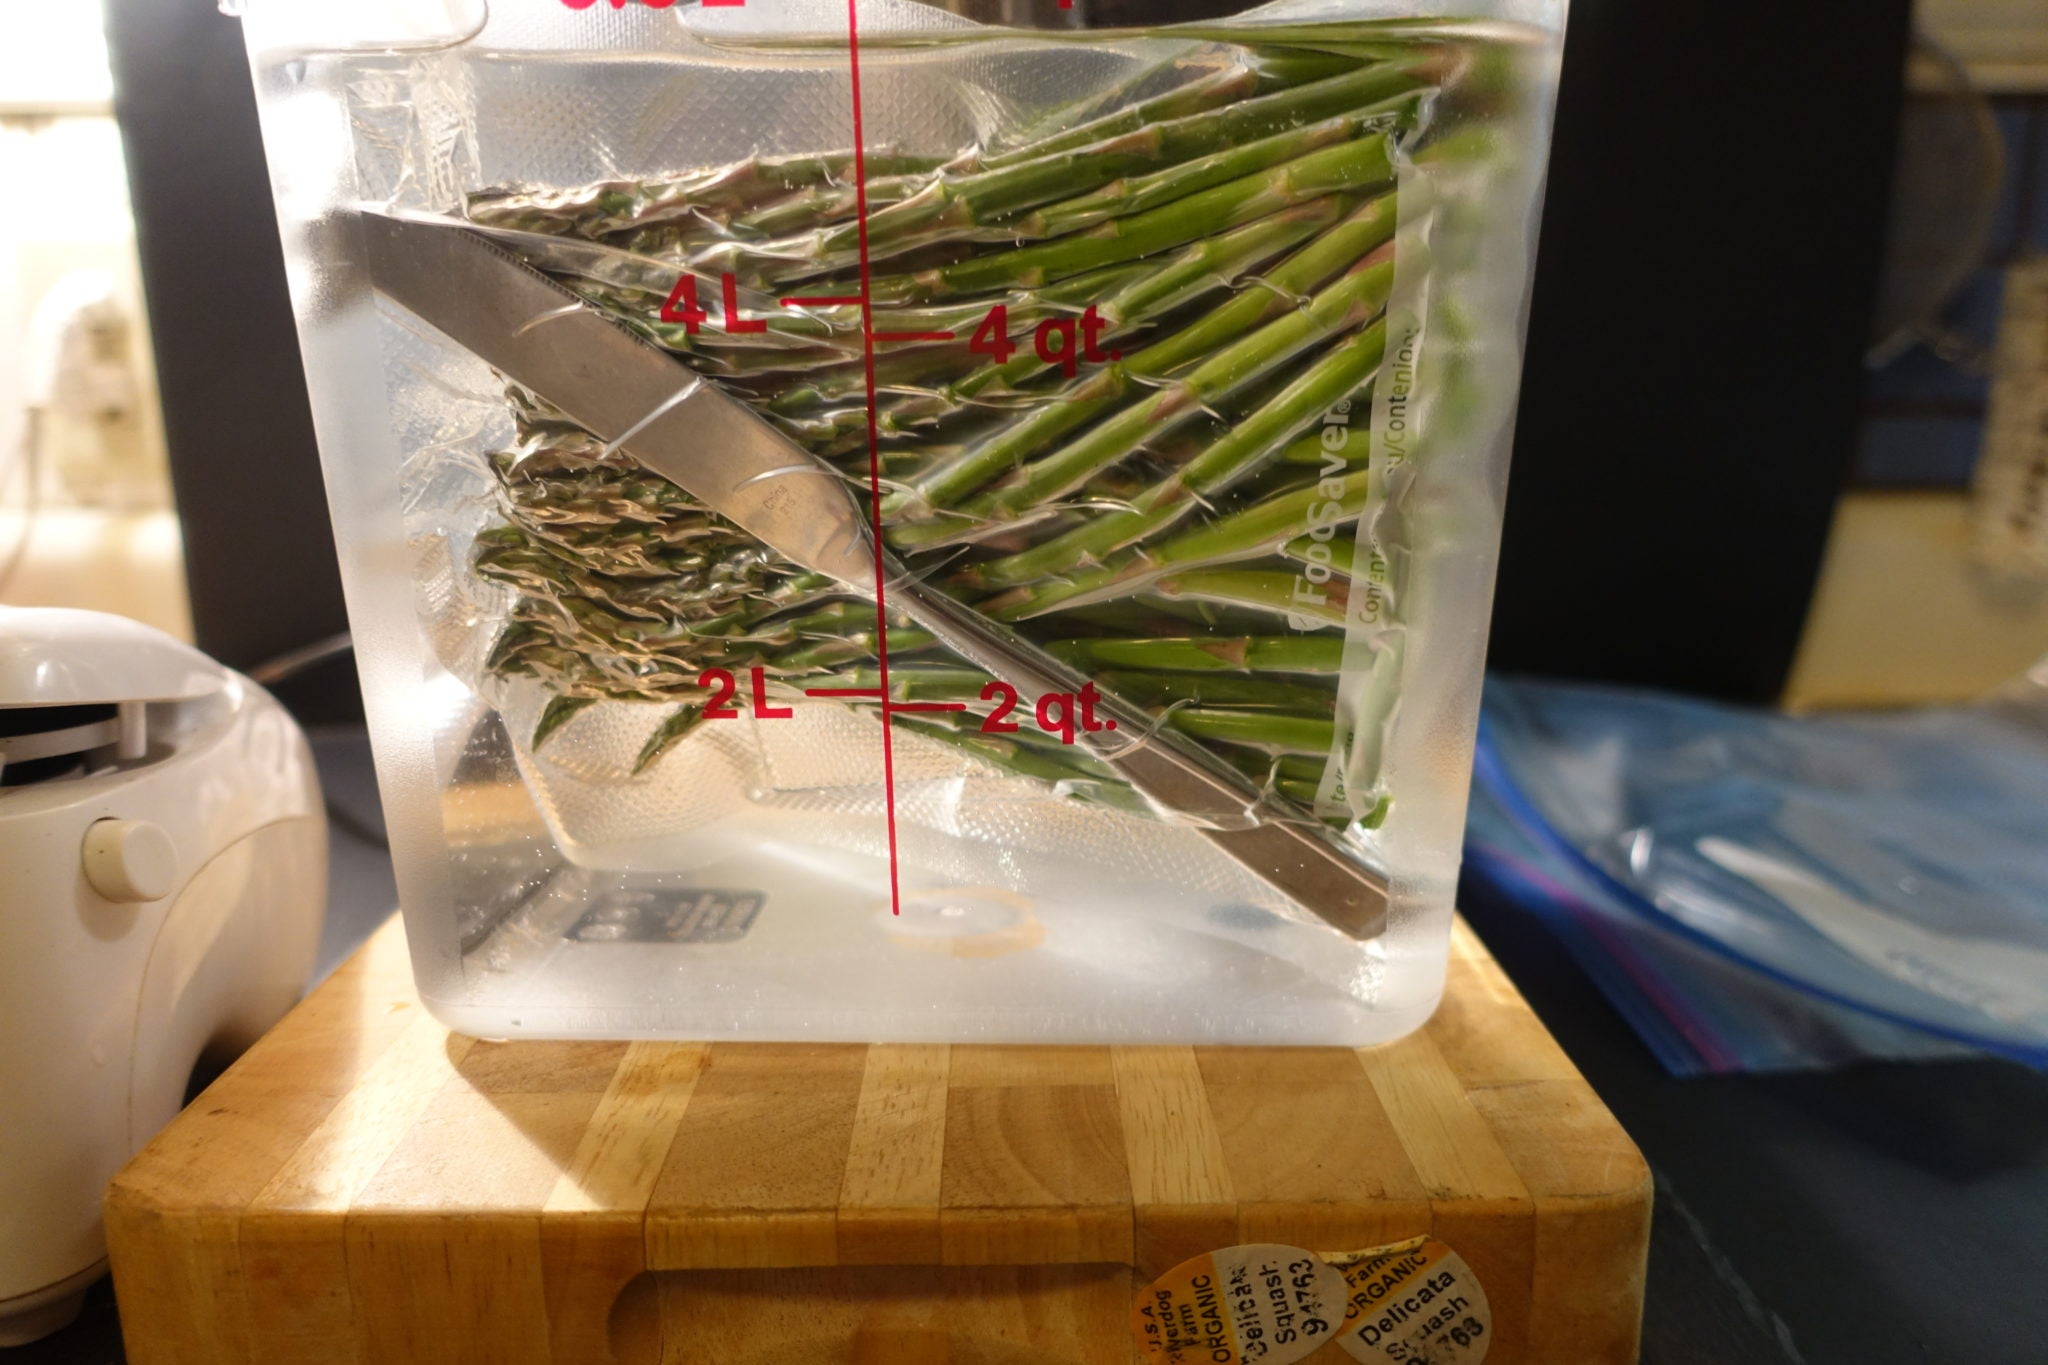
 External Weighting


When all else fails...
There will be cases when despite getting as much air out as possible, sous vide weights will still not work. For these rare situations, we are going to give you a most counterintuitive piece of advice: Don’t seal your bag.Leave bags unsealed
This works when there's either enough gas created in the bag, or you're working with a super persnickety product. The solution is to create a valve-like situation for the gas to be released. Leaving your bag partially unsealed will allow this to happen, but you must also meet other conditions to ensure those typically perfect Anova results that you have become accustomed to. When employing this fix, you MUST:-
Ensure that the bag is large or deep enough for whatever you’re cooking to be completely submerged by water while the top remains clipped to the side of the container. This is effectively a constant application of the immersion method, so air will not be making its way in from the top given pressure of the outside water.
- Keep the unsealed opening OUT of the water AT ALL TIMES.
- Periodically assist any gathered gases towards that opening using a silicon spatula or wooden spoon. Use something that will not compromise the integrity of the bag with sharp edges.

4 comments
Glass lids for preserving jars
inexpensive glass fermentation weights
Genius idea with the coins, going to make up mine tomorrow.
Marbles worked great.