
Sous Vide Steak Guide
Introduction to Sous Vide Steak
Steak is one of the most popular foods to cook for first-time sous-vide enthusiasts and with good reason. Cooking steak in a skillet or on the grill the traditional way leaves lots of room for error and an over- or undercooked steak is a big mistake to make when there's a Prime-grade dry-aged ribeye on the line. Sous-vide cooking takes all of the guesswork out of the process, delivering steaks that are cooked perfectly to precisely the temperature you like them each and every time. Not only that, but because sous-vide is such a gentle cooking process, you'll be able to achieve results that are more evenly cooked from edge to edge than even the best steakhouses in the world.
That's right: Sous-vide cooking allows you to cook better than the best steakhouse.
While this guide has been helpful over the years, we've recently created a new, much more comprehensive sous vide steak guide that covers everything from basics to advanced techniques. Check it out to take your steak to the next level.
Cooking Steak Sous Vide
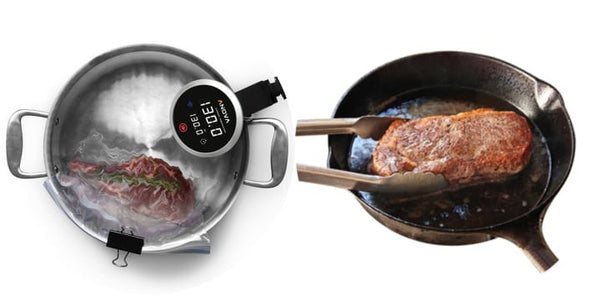
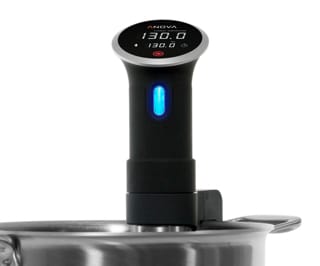
Cooking steak sous-vide is a two phase process. The first phase involves sealing the steak in a plastic bag using either a vacuum sealer or the water displacement method and cooking it to the desired final temperature in your sous-vide device. The second phase is to sear the meat to develop color, flavor, and textural contrast on its surfaces and to help render and soften its fat.
The temperature of the sous-vide bath during the initial cooking phase is what determines the final doneness of your steak.
Temperature and Timing
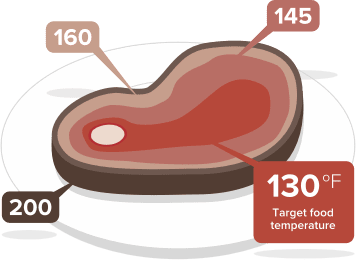
The doneness of a steak is by and large determined by the maximum internal temperature it reaches during cooking. For instance, so long as a strip steak does not rise above 130°F (52°C) it will never cook beyond medium-rare.
Follow the temperature and timing guides for individual steak cuts for more details.
Traditionally Cooked Steak
With traditional cooking methods, there is a very short window of time during which your meat is perfectly cooked. A minute too long will mean overcooked meat.
Sous Vide Cooked Steak
With sous-vide cooking, on the other hand, that window of time is stretched into hours, which means your steak will be hot and ready to go whenever you're ready to sear and serve it.
Strip and Ribeye Steak

Highly marbled cuts like a grain-finished Prime-grade ribeye and strip should be cooked a few degrees F higher than leaner steaks like tenderloin as their copious intramuscular fat helps keep them moist while delivering plenty of flavor. I prefer ribeyes and strip steaks cooked to medium-rare to medium around 129°F (54°C) to 135°F (57°C). Fattier steaks also have natural insulation which means they'll take slightly longer to reach the correct internal temperature.
Timings are all given for steaks 1 1/2- to 2-inches thick. For steaks 1-inch or less, initial cooking time can be shortened to 40 minutes. Steaks cooked under 130°F (57°C) should not be cooked longer than 2 1/2 hours at a time for food safety reasons.
| Preferred Doneness | Temperature | Time |
| Very rare to rare | 120°F / 49°C to 128°F / 53°C | 1h to 2h 30m |
| Medium-rare | 129°F / 54°C to 134°F / 57°C | 1h to 4h |
| Medium | 135°F / 57°C to 144°F / 62°C | 1h to 4h |
| Medium-well | 145°F / 63°C to 155°F / 68°C | 1h to 3h 30m |
| Well done | 156°F / 69°C and up | 1h to 3h |
Tenderloin Steak
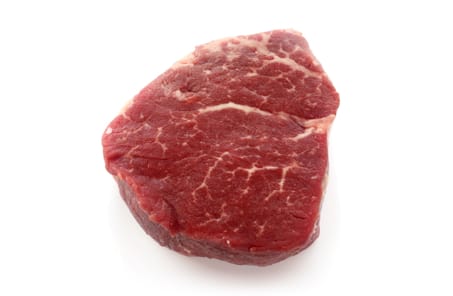
Lean tenderloin is easily overcooked and without intramuscular fat, will become dry. I cook my tenderloin steaks several degrees F lower than fattier cuts like ribeye or strip. I like my tenderloin in the very rare to rare range, between 120°F (49°C) and 128°F (53°C) for optimal tenderness and moistness.
Timings are all given for steaks 1 1/2- to 2-inches thick. For steaks 1-inch or less, initial cooking time can be shortened to 30 minutes. Steaks cooked under 130°F (57°C) should not be cooked longer than 2 1/2 hours at a time for food safety reasons.
| Preferred Doneness | Temperature | Time |
| Very rare to rare | 120°F / 49°C to 128°F / 53°C | 45m to 2h 30m |
| Medium-rare | 129°F / 54°C to 134°F / 57°C | 45m to 4h |
| Medium | 135°F / 57°C to 144°F / 62°C | 45m to 2h 30m |
| Medium-well | 145°F / 63°C to 155°F / 68°C | 45m to 3h 30m |
| Well done | 156°F / 69°C and up | 1h to 3h |
Porterhouse & T-Bone Steak

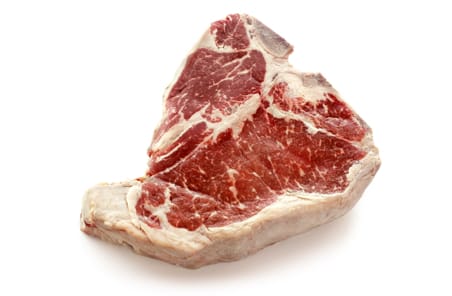
Porterhouse and T-bone steaks contain a large section of strip and a smaller section of tenderloin. Since both sides must be cooked together, it's better to select a temperature and time based on the side you like to eat better.
For me, I'll optimize cooking time and temperature for the strip. It means my tenderloin comes out slightly more cooked than I generally prefer, but the insulating bone helps it stay plenty moist and juicy.
| Preferred Doneness | Temperature | Time |
| Very rare to rare | 120°F / 49°C to 128°F / 53°C | 45m to 2h 30m |
| Medium-rare | 129°F / 54°C to 134°F / 57°C | 45m to 4h |
| Medium | 135°F / 57°C to 144°F / 62°C | 45m to 2h 30m |
| Medium-well | 145°F / 63°C to 155°F / 68°C | 45m to 3h 30m |
| Well done | 156°F / 69°C and up | 1h to 3h |
Preparing a Steak to Cook Sous Vide
Preparing a steak for sous-vide cooking is a simple as purchasing it and sealing it in a plastic bag. For best results, start with large steaks that 1 1/2 to 2-inches thick. And remember: It's better for two people to share one steak than to each have their own thinner steak.
Pre-heat your sous-vide cooker to the desired final temperature according to the chart TK. Allow the water bath to come to temperature before adding your steak.
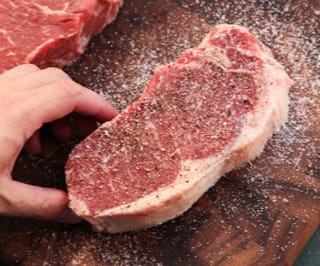
If you're planning on cooking and eating them immediately, season generously with salt and pepper then slide it into a vacuum-sealer or heavy-duty plastic bag. If sealing now to freeze or cook for later, omit the salt and pepper (it will get added later on).
Step 3: Add Aromatics
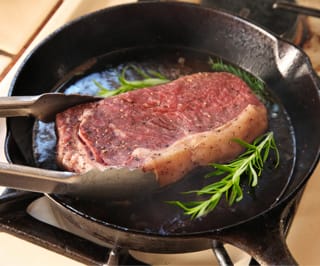
If using aromatics like thyme or rosemary sprigs, add a few to the bag now, distributing them evenly on both sides of the steak.
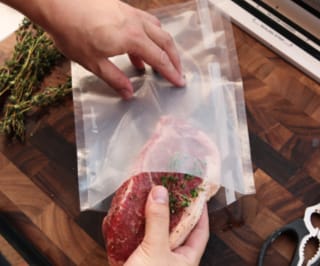
Step 4: Seal Bag
Seal the bag either using a vacuum-sealer or if using a zipper-lock bag, by using the water displacement method.
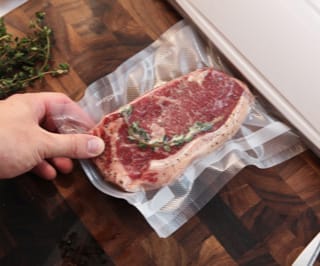
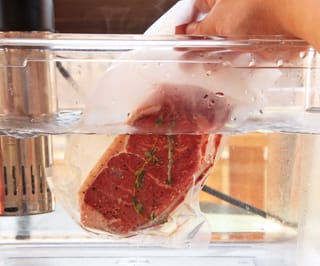
Step 5: Cook the Steak
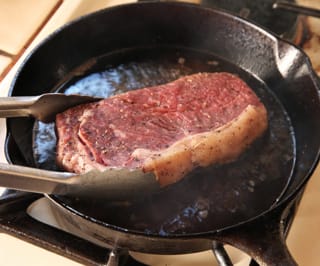
Drop the bag in the water bath, making sure not to block the intake our output sections of your precision cooker. If properly sealed, it steak should sink. Cook according to the timing charts.
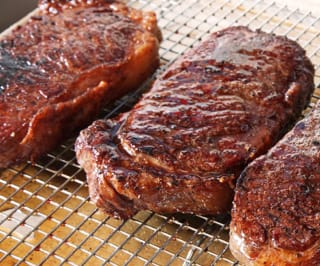
To Finish on the Stovetop
Remove the steak from the bag and place it on a paper towel-lined plate. Pat is dry very carefully on both sides. If you did not season before bagging the steak, season it now generously with salt and pepper.

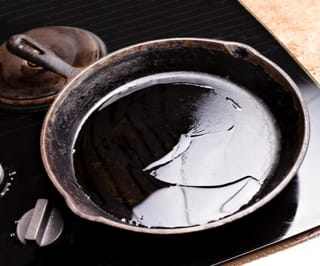
Step 2: Preheat a Cast Iron or Stainless Steel Skillet
Turn on your vents and open your windows. Place a heavy cast iron or stainless steel skillet with 1 tablespoon of vegetable, canola, or rice bran oil over the hottest burner you have and preheat the skillet until it starts to smoke.
Step 3: Start Searing
Gently lay the steak in the skillet using your fingers or a set of tongs. If desired, add a tablespoon of butter. Butter contains milk solids that will blacken and char, helping your steak achieve a dark crust much faster and adding a characteristic slightly bitter, charred flavor. I happen to like this flavor (and it's typical of a steakhouse experience). For a cleaner-tasting sear, omit the butter at this stage.
Step 4: Add Aromatics
If desired, add aromatics like whole thyme and rosemary sprigs with the leaves still attached, sliced shallots, or crushed whole garlic cloves.
Step 5: Flip and Repeat
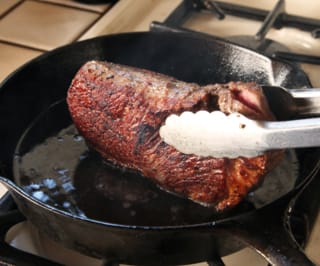
After 15 to 30 seconds, flip the steak so that the second side comes into contact with the pan. Repeat, flipping the steak every 15 to 30 seconds until it has developed a nice brown sear, about a minute and a half total. If you did not add butter in step 3, add butter to the skillet about 30 seconds before the steak is done for added richness.

Step 6: Get the Edges
Using tongs, pick up the steak and rotate it so that the edge is in direct contact with the skillet. Continue to cook, rotating the steak along this edge until all of the edges are browned, about another 45 seconds total.
Step 6: Serve
Transfer the steak to a wire rack set in a rimmed baking sheet. When ready to serve, reheat any fat and juices left in the pan until sizzling then pour them over the steak to re-crisp and moisten the surface (the steaks can be served immediately if you are ready, no need to rest a sous-vide steak). Serve steaks immediately with coarse sea salt such as Maldon on the side.

To Finish on the Stovetop with a Torch
Step 1: Remove the Steak From the Bag
Remove the steak from the bag and place it on a paper towel-lined plate. Pat is dry very carefully on both sides. If you did not season before bagging the steak, season it now generously with salt and pepper.
Step 2: Preheat a Cast Iron or Stainless Steel Skillet
Turn on your vents and open your windows. Place a heavy cast iron or stainless steel skillet with 1 tablespoon of vegetable, canola, or rice bran oil over the hottest burner you have and preheat the skillet until it starts to smoke.
Step 3: Start Searing
Gently lay the steak in the skillet using your fingers or a set of tongs. If desired, add a tablespoon of butter. Butter contains milk solids that will blacken and char, helping your steak achieve a dark crust much faster and adding a characteristic slightly bitter, charred flavor. I happen to like this flavor (and it's typical of a steakhouse experience). For a cleaner-tasting sear, omit the butter at this stage.
Step 4: Add Aromatics
If desired, add aromatics like whole thyme and rosemary sprigs with the leaves still attached, sliced shallots, or crushed whole garlic cloves.
Step 5: Flip and Torch
Flip the steak immediately and start torching the first side working in slow, even strokes back and forth across its entire surface until it is pale brown with a few darker singed spots. This should take about 30 seconds.

Step 6: Flip and Repeat
If you did not add butter in step 3, add butter to the skillet now for added richness. Flip the steak and torch the second side until it is very well browned, about 30 seconds longer. Flip the steak once more to ensure that the first side has achieved full browning.

Step 7: Get the Edges
Using tongs, pick up the steak and rotate it so that the edge is in direct contact with the skillet. Continue to cook, rotating the steak along this edge until all of the edges are browned, about another 45 seconds total.
Step 8: Serve
Transfer the steak to a wire rack set in a rimmed baking sheet. When ready to serve, reheat any fat and juices left in the pan until sizzling then pour them over the steak to re-crisp and moisten the surface (the steaks can be served immediately if you are ready, no need to rest a sous-vide steak). Serve steaks immediately with coarse sea salt such as Maldon on the side.
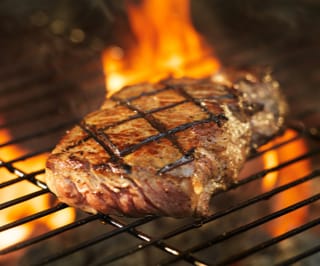
To Finish on the Grill
Step 1: Preheat Grill
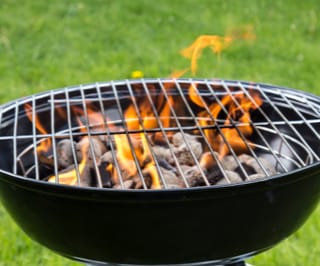
Make sure to have your grill preheated before your steak comes out of its sous-vide bath and bag. Light one chimney full of charcoal (about 5 quarts of coals) When all the charcoal is lit and covered with gray ash, pour out and arrange the coals on one side of the charcoal grate. Set cooking grate in place, cover grill and allow to preheat for 5 minutes. Alternatively, set half the burners on a gas grill to the highest heat setting, cover, and preheat for 10 minutes. Scrape the grill grates clean with a grill scraper, then oil the grates by holding an oil-dipped kitchen towel or paper towels in a set of tongs and rubbing them over the grates 5 to 6 times.
Step 2: Remove the Steak From the Bag
Remove the steak from the bag and place it on a paper towel-lined plate. Pat is dry very carefully on both sides. If you did not season before bagging the steak, season it now generously with salt and pepper.
Step 3: Sear
Place steak directly over the hot side of the grill and cook, turning every 15 to 30 seconds, until a deep, rich crust has formed, about 1 1/2 minutes total. If the fire threatens to flare up as the steak drips fat into it, suffocate the fire by closing the grill lid until the flames die out. Alternatively, transfer the steak to the cooler side of the grill using a set of long tongs until the flames subside Do not allow the steak to get engulfed in flames.
Step 4: Serve
Transfer the steak to a wire rack set in a rimmed baking sheet. When ready to serve, reheat any fat and juices left in the pan until sizzling then pour them over the steak to re-crisp and moisten the surface (the steaks can be served immediately if you are ready, no need to rest a sous-vide steak). Serve steaks immediately with coarse sea salt such as Maldon on the side.
Frequently Asked Questions
None! Just kidding. Sous-vide-style precision cooking is a technique, another tool in your arsenal, and just like all techniques, there's a tradeoff. Here are a few of the most immediate:
- It takes longer. A traditionally-cooked steak goes from fridge to plate in 15 to 20 minutes (a bit longer if you have to preheat your oven). A sous-vide steak will take an hour or more, though with sous-vide cooking, this time is almost 100% hands-off.
- You will not achieve the exact same sear. Sous-vide flag-waving zealots may claim otherwise, but the rapid sear you achieve after cooking sous-vide will not be as thick or crusty as the sear you get from a traditional cooking method. Some folks prefer a thicker sear, others prefer the thin sear achieved during sous-vide cooking.
- It requires more equipment. Cooking a steak sous-vide requires a precision cooker and a plastic bag or vacuum sealer in addition to all the tools required for more traditional methods. Chances are if you're reading this article you already have those extra tools.
Seasoning a steak prior to vacuum sealing it then letting it rest in the bag can result in meat that has a firm texture similar to a mildly cured ham. Some folks find this texture off-putting, though I personally don't mind it. To avoid this texture, it's best to season and bag a steak immediately before cooking, or after cooking sous-vide and before searing.
In either case, only the exterior of a steak will be seasoned, so it's always a good idea to serve your steak with coarse sea salt such as Maldon for sprinkling at the table as your guests slice.
What happens if I leave a steak in the sous-vide cooker for longer than the maximum time recommendations?So long as you're cooking at above 130°F, there are no real health risks associated with prolonged sous-vide cooking. You will, however, eventually notice a difference in texture. At 130°F, steak cooked for 1 to 4 hours will have a traditional texture with plenty of meaty chew. Above that timeframe and connective tissue will start to break down, turning the steak softer, for some folks unpleasantly so.
A slice of steak cooked at 130°F for 24 hours will look like a nice, pink medium-rare steak, but it will shred and flake as you chew it instead of gently yielding to pressure. These differences in texture over time will amplify at higher cooking temperatures. A steak cooked at a well-done 160°F, for instance, will be soft and shreddable (and dry) after only 8 to 12 hours.
For best results, I don't recommend cooking any longer than the maximum recommended time for each cut and temperature range.
Should I add butter, oil, or any other liquid or fat to the sous-vide bag?No. Intuitively you may think that adding a flavorful fat like butter or olive oil will in turn help create a more flavorful steak, but in fact it achieves the opposite goal: it dilutes flavor. Fat-soluble flavor compounds dissolve in the melted butter or oil and end up going down the drain later on. For best results, place your seasoned steak in a bag alone.
Can I add aromatics like herbs or alliums to the sous-vide bag?Yes you can. I like to add thyme or rosemary sprigs along with sliced shallots or garlic cloves to the bags with my steaks during cooking. Adding the same aromatics to the pan as you sear the steaks will bolster that flavor.
Can I add a spice rub to my steak?Yes you can, but spice rubs behave quite differently under sous-vide conditions than standard cooking conditions. Normally, aromatic compounds will dissipate into the air in the kitchen or over your grill as a spice-rubbed steak cooks. At the same time, moisture dissipates, which means what's left of your spices sticks firmly to your meat. With sous-vide cooking, there's no way for that flavor to escape the bag. Meanwhile, spices rubbed on the surface of the meat have a tendency to get rinsed off by any juices that are being expressed.
The short answer is that it's very tough to predict exactly how spices are going to react in a sous-vide bag. I've found that if I want spice flavor, it's better to rub the spices into the meat after the sous-vide cooking phase and before the final searing phase.
Should I sear my steak before adding it to the bag?After repeated testing and blind taste tests, I've found that pre-searing a steak--that is, browning the steak before it goes into the sous-vide bag then browning it a second time just before serving--serves at most a very minimal role in improving flavor or texture. In most cases, the difference is imperceptible. There's no harm in pre-searing a steak, but I prefer the ease and convenience of simply placing the steak in the bag raw before cooking, leaving the searing for a single step at the end.
What about deep-frying the steak instead of searing after cooking sous-vide?Deep-frying a steak cooked sous-vide can be a lot of fun and it's true, you'll get a very quick, evenly browned crust on your meat, but there are a few downsides. First, the obvious: it requires you to have a large vessel filled with hot oil to deep fry. If you're anything like me, you like to keep deep frying to a minimum at home.
Perhaps more importantly, deep frying has a relatively low maximum temperature that is defined by the oil's smoke point--generally around 450°F (232°C) or so. Oil in a skillet or a steak on a grill, on the other hand, can achieve temperatures a couple hundred degrees higher than this, allowing your steak to char rather than simply brown. For me, this charring and the intense flavor it brings is one of the hallmarks of a great steak experience.
Can I use a torch alone to finish a steak?I would strongly recommend against it. Torches are extremely intense heat sources that basically follow the inverse-square law: their intensity dissipates with the square of the distance from the torch head. What this means is that any unevenness in the surface of your steak gets amplified; Areas that are slightly elevated will singe before areas that are lower will even begin to brown properly.
While it's possible to get reasonable browning with a torch by holding it at a distance great enough that this effect is minimized and by making multiple slow passes across the surface of a steak, I find the hassle and time it takes to do so much more of a headache than simply cooking a steak in a hot skillet with the torch as an added heat source. Besides, a steak cooked with a skillet and torch combo comes out with a better crust in the end anyway.
What's the best torch for searing steak?Standard propane torches with manual-ignition heads have trouble staying lit when inverted. This can be a problem when you're frantically trying to relight a torch as your steak sears in a hot skillet. Adding a Searzall unit [JKLA: can we link to this?] will not only ensure that the flame stays lit, but it will also diffuse the flame, allowing you to get a more even sear.
Want to keep things on the cheap? I find that a standard butane gas canister with a high-intensity torch head like the Iwatani Torch Burner does a more than adequate job. It's what I pack in my travel cooking kit.
Does steak finished with a torch acquire any off-aromas?Finishing a steak with nothing but the naked flame of a propane or butane torch can indeed leave an off, gasoline-like aroma on the surface of the meat due to imperfect combustion. However, if you are using the skillet-torch combination method, the added heat from the skillet will help the fuel combust more completely while the dilution of any un-combusted fuel by the fat and juices in the pan will render them completely imperceptible.
If, for some reason, you do choose to sear with a torch alone, a Searzall unit will improve combustion efficiency and completely eliminate those odors.
Can I chill and reheat my steak after cooking it sous-vide if I haven't opened the bag?It's true that given a high enough temperature (130°F or higher) and a long enough time period (several hours), the contents of a sealed sous-vide bag should be close to sterile, which means that rapid chilling via an ice bath followed by rapid reheating should pose no health risks, though I still strongly recommend against it whenever avoidable: it's not doing any favors for the quality of your steak.
Word of warning: never chill and reheat any food that has been cooked or held at a temperature lower than 130°F. These temperature are not hot enough to destroy dangerous bacteria.
Can I cook a steak straight from the freezer?Yes! I often seal seasoned, ready-to-cook steaks in sous-vide bags and stack them in the freezer. For steaks an inch to 2 inches thick, when ready to cook, allow an extra hour for the steak to fully thaw in the hot water bath before you begin timing it for doneness.
Does sous vide steak need to rest?Traditionally cooked steaks need to rest. That is, they need to be placed aside for five to ten minutes before cutting and serving. This resting period is to allow time for the temperature gradient within the steak to even out. The cooler center is gently heated by the hotter outer edges, while they in turn lose some of their heat to the outside world. Even temperature is important: it's what prevents a steak from leaking its juices everywhere the moment it's been sliced open.
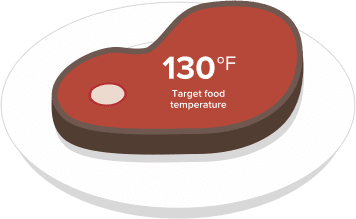
Because a sous-vide steak cooks from edge to edge more or less perfectly evenly, there is no temperature gradient inside. A medium-rare steak should be 130°F from the very center to the outer edge with only the outer surfaces hotter after searing. Sous vide steaks should be served immediately after searing.