

I scream…you scream...we all scream for perfectly silky, creamy, flavorful, foolproof ICE CREAM!
After making gallons and gallons of homemade ice cream over the years, it still amazes me how simple, everyday ingredients can be transformed into big crowd-pleasers. Using the Anova guarantees fuss-free, flavor-infused custards time after time. No more dealing with stovetop cooking, scorched cream, and dirty dishes.
To get started, let’s create a basic base that you’ll use for years to come, then build a few basic flavors, including vanilla bean, coffee bean, and fresh mint with dark chocolate. The possibilities are endless for sous vide custard ice cream and sous vide gelato.
Sous Vide Ice Cream

Here’s what you’ll need for our sous vide ice cream base:
-
Anova Precision® Cooker – to perfectly cook and infuse your sous vide custard ice cream at a constant temperature.
-
Resealable sous vide bag(s) – to contain ice cream sous vide during its bath. Unless you have a chamber vacuum sealer, a resealable bag is your best bet. Use the edge of your counter or displacement method to remove excess air from the bag before sealing.
- Whisk or immersion blender – to combine the ingredients before and sometimes after the cook.
- Egg yolks – to bind the fat and water for a creamy, rich texture, while adding stability and improved melt rate. We've found pastured eggs provide much more flavor. Cold eggs separate easier than room temperature, so if you're ever worried about yolks getting into white, separate while cold.
- Sugar – to sweeten and help lessen freezing (or ice crystals), so we don’t get a mouthful of icy ice cream when it’s time to enjoy.
- Salt – to enhance flavor and freezing. We use kosher salt.
- Cream (milk–fat) – for richness, flavor, body, smooth texture and good melting properties. I use 35% whipping cream. You can omit the milk and choose all cream, but the additional fat tends to mask any added flavors.
- Milk (milk solids) – to balance the flavor by lowering the fat (see cream above), enhance the texture (due to protein) and air-holding ability of the end product. You may substitute milk powder.
- Vanilla beans – optional, but highly recommended for loads of flavor and mini polka-dotty aesthetics. If you don’t have access to the real deal pods, use vanilla bean paste. If you find the cost of either prohibitive, use a good quality pure vanilla extract.
- Kitchen torch – totally optional, but comes in handy to remove excess air bubbles from the custard’s surface, after whisking.
- Ice Cream Churn
Now that we have our ingredients and a basic understanding of their purpose, let’s make some yummy magic.
Sous Vide Ice Cream Recipe Ingredients - makes 1-1.5 qt- 6 large egg yolks pasture run for best flavor
- 128 grams granulated cane sugar
- 0.6 gram kosher salt
- 250 milliliters 2% milk
- 500 milliliters 35% heavy cream
1. Preheat Anova Precision Cooker to 185ºF/85°C. Cover the water bath to speed up heating and minimize evaporation.
2. In a large bowl, whisk together the yolks, milk, sugar and salt, until well combined, then whisk in the cream. Remove any resulting foam or bubbles with a kitchen torch (see trick in post above).

3. Pour the ice cream mixture into a resealable sous vide bag and add the vanilla beans and pod. Seal by running the bag along the edge of the counter, or using the displacement method. A regular household vacuum sealer is not recommended.
4. Submerge the sealed bag into the heated water bath and cook for 1 hour.


5. Close to the end of the cook, prepare an ice bath (I use ice and cold water in a large stainless steel bowl). Transfer the cooked base to the ice bath and chill to cool. Once cooled, refrigerate to chill the base in preparation for churning.
At this stage, you may use like a traditional creme anglaise, warm or cold, over fresh fruits, meringue, cakes or tarts. Today, we churn…
Time to Churn
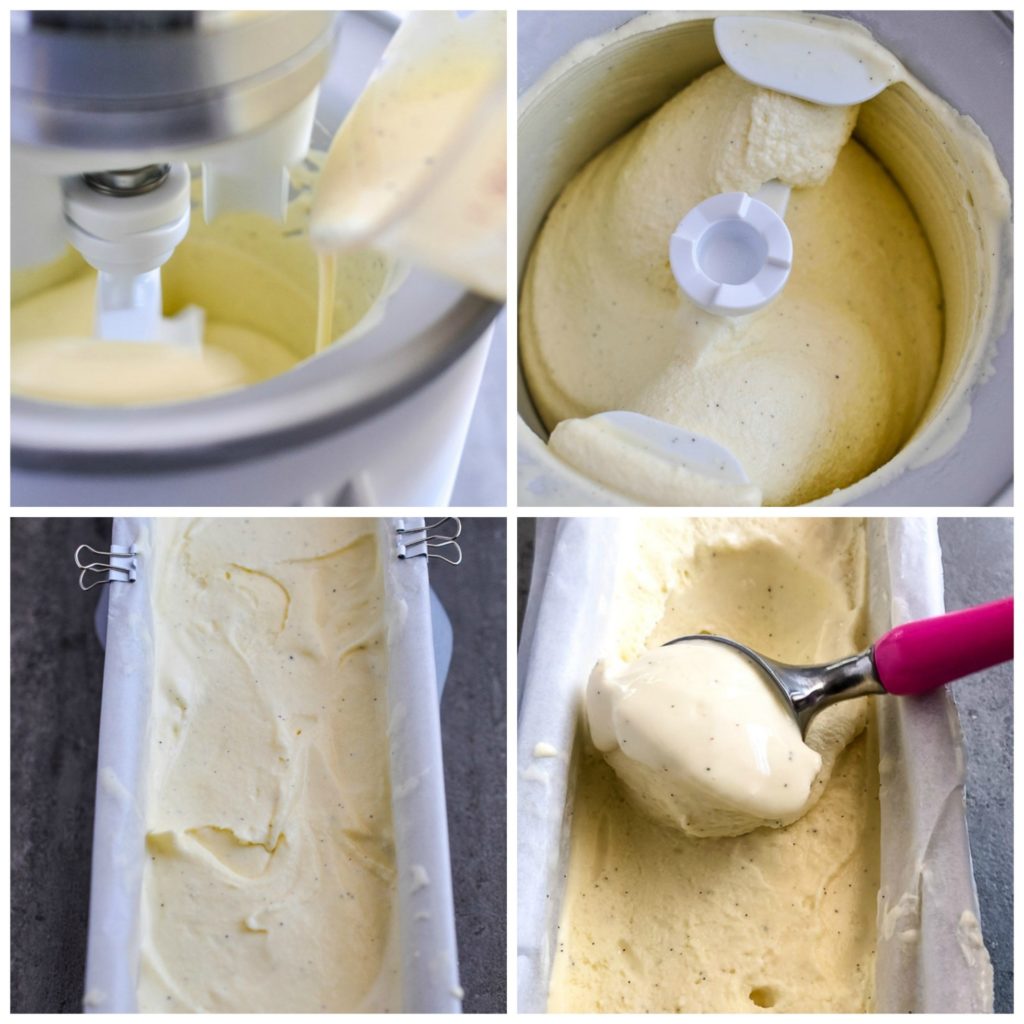
- Set up your ice cream maker, per the manufacturer’s instructions. Mine requires an overnight chill of the bowl, but I keep two bowls in the freezer at all times, cause we love our ice cream.
- With the maker I use, it typically takes about 15-20 minutes, using this type of custard base to get the results in the second photo above.
- Transfer to a freezer-safe container, cover with parchment paper and freeze overnight.
- I am impatient, so I usually enjoy a scoop, soft-serve, before I freeze it.
 Sous Vide Ice Cream Serious Eats
Let's talk about flavor combos. Start with the base recipe above and omit the vanilla beans. Split the custard among two sous vide bags to churn up some mint + dark chocolate and coffee beans.
Fresh Mint + Dark Chocolate Ice Cream
- 15 grams mint leaves
- 64 grams granulated sugar
- 113 grams grated dark chocolate

If you are a mint choco-chip ice cream fan, this one will give you ALL THE FEELS! Infusing the custard with a paste of fresh, home-grown mint and a little sugar guarantees a lovely green color and an irresistible minty flavor. Just mash the mint and sugar together to form a rough paste.
 Once churned, fold in the chocolate. You can use chocolate chips or chunks, but I prefer to grate it for licking, not chewing.
Coffee Bean Ice Cream
- 23 grams coffee beans, coarsely ground

Take a pass on the hot cup of coffee, and kick your summer morning routine into gear with a cool cone. I sit proudly in the tea camp, but I was all over this flavor.
Coarsely ground coffee beans infused in the base during the sous vide cook just took this one over the top, ya’ll! I am already being asked when I plan to make more.
Simply add the beans to the base above before the sous vide cook.

This one requires straining, as well, to remove the beans. I wanted to keep the smaller pieces speckled throughout, but if you prefer a cleaner finish, use a fine sieve or cheesecloth.
Time to enjoy!
I hope my Guide To Sous Vide Ice Cream will get you on the road to preparing your own flavors, using the foolproof, almost hands-off approach of sous vide cooking. I look forward to hearing from you and seeing your creations! Check out more of my work on Instagram @isugarcoatit!
4 comments
Good recipe but my custard curdled slightly at 185 degrees. Other recipes that I’ve used advise 170, which I think may be safer.
I use the exact recipe (although I use vanilla bean paste instead) then, when cool, I top up 2 Ninja Creami tubs, freeze as is for 24 hours then put it through my Ninja Creami Ice cream machine on gelato setting. Superb.
I made something similar and replaced the heavy cream with coconut cream on a whim. Best ice cream I’ve ever had in my life
Would this work the same using APO instead of APC? I tend to use my oven more than my APC. Thanks.